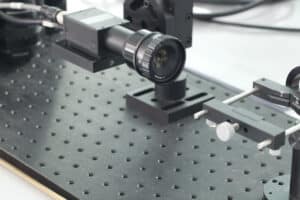
Hole Inspection With Machine Vision

Hole Inspection With Machine Vision
Manufacturing industry continues to evolve and advance in terms of technology. In the past, manual labor was the mainstay of the manufacturing industry. Machines did provide some [much-needed] relief to manufacturers. Human intervention was necessary in almost every aspect of the manufacturing process. Other words, machines are just tools that manufacturers use and require human intelligence to work.
This is no longer the case. As technology advances, human interaction is being reduced. This is especially true in the inspection area. In most manufacturing processes, manual labor has been reduced to a minimum. Machine vision systems (also called computer vision systems) have made this possible.
Machine Vision Systems are on the verge of eliminating manual inspections (or, at least, well on their path to doing so), since they can detect both major and minor defects. These machines have proven to be superior at product inspection and surpass human abilities.
These systems are equipped with a lens of high quality that facilitates image-based testing. The entire inspection is automated. This means greater convenience and increased productivity.
Recently, machine vision systems have improved. They were originally designed to meet lower accuracy and less complex requirements, but now they have improved programmability and speeds.
As a result, machine vision systems are now capable of performing tasks as complex as the inspection of holes.
Industrial Applications of Machine Vision Systems for Hole Inspection
Machine vision systems’ hole inspection capability has been a major benefit to the manufacturing and processing industries. These precision-oriented inspections systems allow manufacturers to evaluate their products and eliminate any defects early on, saving them money, time and reputation.
Machine vision systems can be used to inspect cylindrical and conical objects. These systems are also used for the inspection of cavities and containers. The automated inspection system can inspect both the vertical and circular walls of a hole.
Hole Inspection in the Automotive Industry
Automobile manufacturing involves the production of components in various sizes that make up a fully-functional vehicle. The majority of components have multiple holes, where bolts will be screwed later.
The machine vision system measures the size of each hole. Machine vision systems can even measure the size of each hole. Components that have incorrect hole sizes, or holes with the wrong numbers, are removed from production. This is done to prevent the issue from escalating into a product recall.
Vision systems are also appreciated by the industry for their high-volume production capabilities of valve covers, an essential component of an automobile engine. They are much faster than the previous coordinate measuring machines.
Vision inspection systems are excellent at determining the size and position of seven holes on a valve cover.
Machine vision systems are preferred by manufacturers not only for their accuracy but also for the compactness and cost-effectiveness of these systems. They can also be reprogrammed easily to accommodate any changes in design.
Hole inspection in the Mining Industry
Two companies that offer bespoke automation solutions – RNA Automation in the UK (a member company of Rhein-Nadel Automation), and Fisher Smith – have demonstrated machine vision systems’ ability to inspect holes in gas safety devices. They developed a laser-drilled hole inspection system.
The inspection system automates the inspection of the holes in plastic components of gas detectors for the mining industry. The plastic component contained laser-drilled hole of different diameters.
The machine is designed to inspect holes of different sizes. The size of both the entry point and exit point were checked. Accuracy was crucial as it allowed for the sensor to perfectly fit the plastic component.
Hole Inspection in the Telecommunications Industry
Machine vision systems are also used by manufacturers in the telecommunications sector to produce printed circuit board (PCB). The PCB is the core component of modern electronic devices and it connects all electronic components.
PCBs may be manually examined with the naked eye or magnified. As human inspection abilities are limited, manufacturers opt for automated optical inspection using machine vision systems.
These inspection systems examine each hole on the board. The position of the holes is crucial and affects the placement of electronic components. Visual inspection is therefore a crucial process.
Machine vision systems are designed to detect products that have holes or defects in the wrong place, or with excessive amounts of holes. Automated inspection is slowly replacing manual inspection because such intricate tasks require meticulous inspection. The first method reduces costs and detects defects in advance.
Conclusion
Machine vision systems are able to perform quantitative measurements and inspections that humans cannot. These machines are commended for the precision and accuracy with which they perform tasks. These systems are now an essential part of manufacturing.
The machines are designed to protect all components from damage, since they require minimal human intervention. All manufactured products are of a higher quality, and free from the errors that are inevitable with manual inspection.
Vision inspection machines are also preferred as they increase productivity and improve competitiveness. The less human interaction they require, the safer the workers are from hazardous environments in manufacturing facilities.
Related Posts
Photoelectric Sensors
How useful was this post? Click on a star to rate it! Submit Rating As you found this post useful......
3D Printing And Terahertz Radiation
How useful was this post? Click on a star to rate it! Submit Rating As you found this post useful......


